
How to Perform a Laparoscopic Sleeve Gastrectomy
Column Editors: Raul J. Rosenthal, MD, FACS, FASMBS, and Daniel B. Jones, MD, MS, FACS
This month’s technique: How to Perform a Laparoscopic Sleeve Gastrectomy
This Month’s Featured Expert: Gregg H. Jossart, MD, FACS, Director, Minimally Invasive Surgery, California Pacific Medical Center, San Francisco, California
Bariatric Times. 2012;9(9):8–9
Introduction
The sleeve gastrectomy has become increasingly common in the last few years, yet it is still not technically standardized. Controversy exists over bougie size and pouch calibration, extent of antral resection, management of reflux and hiatal hernias, and the use of buttress materials and staple line suturing methods. Moreover, postoperative problems from a suboptimal technique may not present for months or years after surgery, and thus, it is difficult to evaluate differing technical preferences. This article describes one surgeon’s technical preferences.
Step 1: patient positioning and port placement
The patient is placed in the supine position and then Trendelenberg once ports have been placed. A 12mm or 15mm port is placed either at the umbilicus or superior and to the right, depending on the size of the patient and the pannus. A 5mm or 3mm subxiphoid Nathanson liver retractor is placed to retract the left lateral segment of the liver.
Assisting ports can be a 5mm right upper paramedian port for the surgeon’s left hand and a 5mm left anterior axillary line port for the assistant’s right hand. A 5mm left upper paramedian port is placed for the scope (Figure 1).
Step 2: gastric mobilization
Mobilization of the fundus. Using the energy source, make a window into the omental bursa approximately 4 to 6cm proximal to the pylorus. Proceeding superiorly, seal and divide the short gastric vessels directly on the serosa of the stomach. Stop and reverse direction once exposure becomes difficult.
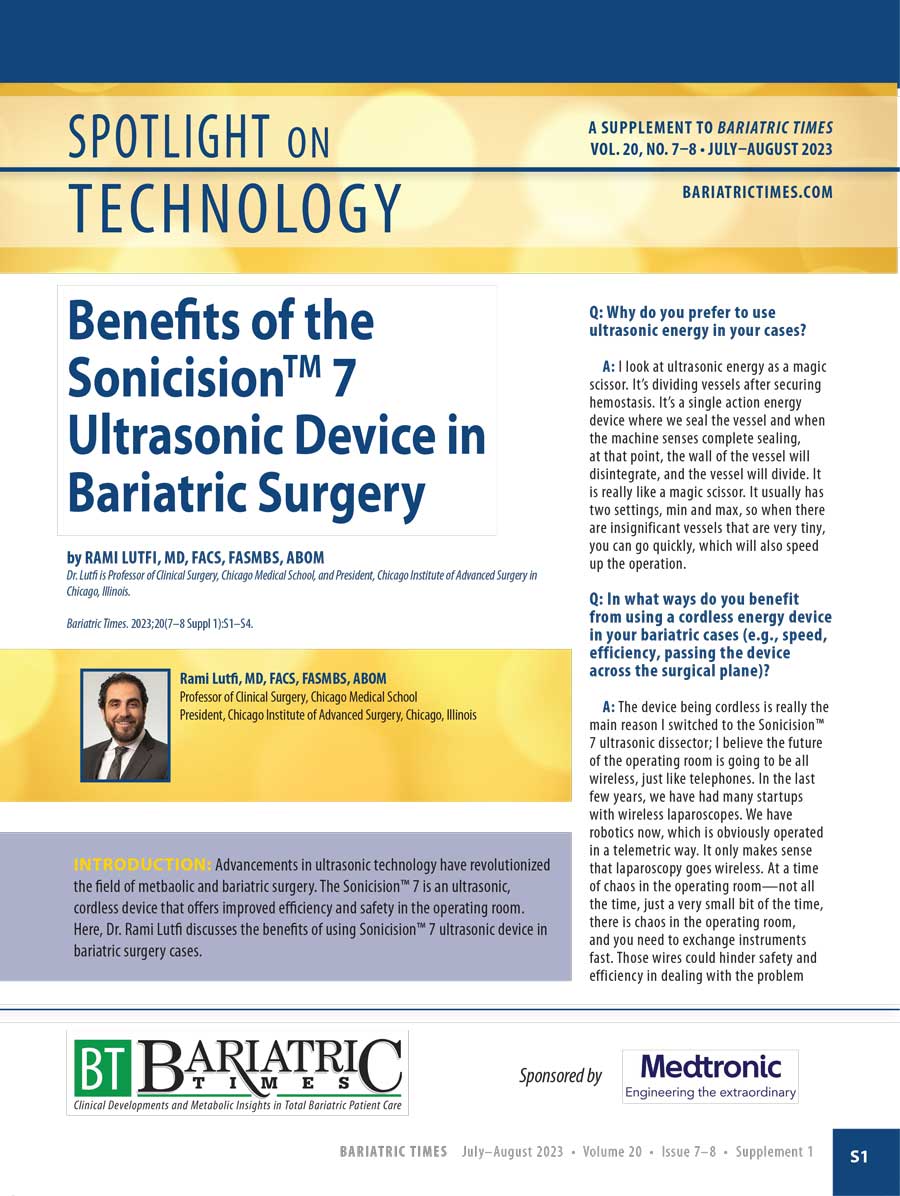
Mobilization of the antrum. As the pylorus is approached, be aware of the gastro-duodenal and right gastric artery becoming the gastroepiploic artery. Usually, stopping the dissection about 2cm proximal to the pylorus will prevent injuring one of these vessels and preserve perfusion of the distal antrum and pylorus (Figures 2a and 2b).
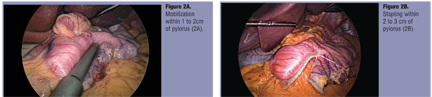
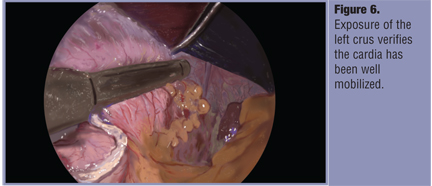
Mobilization of the cardia. Once the antrum has been mobilized, it will be easier to retract the stomach toward the patient’s right and thus inferiorly allowing better exposure of the cardia, spleen, and left crus. The final posterior short gastric can be divided along the left crus (Figure 7). The anterior fat pad is often enlarged and obstructs the view of the medial cardia and the distal esophagus. Mobilize this to provide adequate exposure of this area for optimal stapling and placement of sutures (Figure 7).
Step 3: Gastrectomy
Antrum. A 32 French orogastric bougie is placed adjacent to the pylorus. The 32 French bougie is used as this is the smallest size that avoids stenosis yet minimizes the chance of antral and pouch dilation. A 60mm black or green cartridge is used to staple 2 to 3cm proximal to the pylorus (Figures 2a and 2b). Seromuscular fracturing in this region is common with any type of staple cartridge and must be reinforced with sutures.
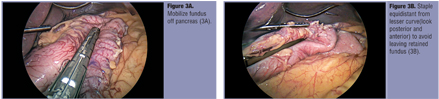
Angularis/fundus. The second cartridge is in proximity to the angularis and care must be taken to avoid stenosis here (Figures 3a and 3b). Cartridge placement is optimized by checking the locations of the anvil and cartridge both anteriorly and posteriorly (Figure 4 and Figure 5
). Black, green, or purple cartridges may be used in this region. Smaller stapler cartridges are not advised. The additional hemostasis that may be provided can be offset by staple line disruption later. Buttress material may be used for hemostasis, but avoid undersizing the cartridge when using thicker materials.
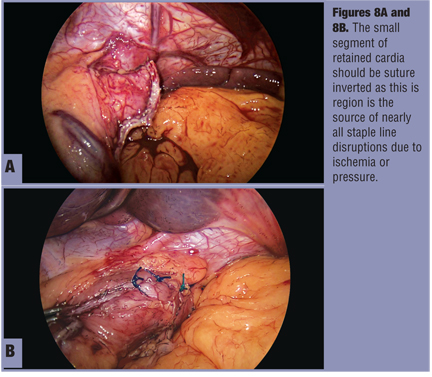
Cardia. Placement of the last two cartridges at the top of the stomach can be the most difficult for proper calibration. It is important to rotate the stomach and the stapler anteriorly to carefully examine and retract the posterior gastric wall through the cartridge prior to closing it (Figure 6). The final cartridge should be placed 1 to 2cm from the gastroesophogeal (GE) junction to allow for suture reinforcement of the cardia (Figure 7). Suture invert the apical staple line with 1 or 2 Lembert type sutures (Figures 8a and 8b).
Step 4: Omentopexy
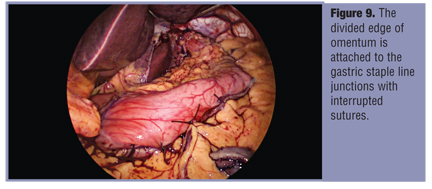
Identify the divided edge of the omentum superiorly and, using absorbable interrupted sutures, attach it to the staple line junctions (Figure 9). Approximately 3 to 4 sutures are used above the angularis and 2 to 3 sutures at and below the angularis. This omentopexy provides additional reinforcement to the staple line but also creates gentle traction that can reduce the incidence of postoperative gastric volvulus or coiling.
References
1. Brethauer SA, Hammel JP, Schauer PR. Systematic review of sleeve gastrectomy as staging and primary bariatric procedure. Surg Obes Relat Dis. 2009;5(4):469–75.
2. Himpens J, Dobbeleir J, Peeters G. Long-term results of laparoscopic sleeve gastrectomy for obesity. Ann Surg. 2010; 252(2):319–324.
3. Santoro S. Technical aspects in sleeve gastrectomy. Obes Surg. 2007; 17(11):1534–1535.
Funding: There was no funding for the preparation of this manuscript.
Disclosures: Dr. Jossart is a lecturer for Covidien and Ethicon Endo-Surgery, Inc.
Category: Past Articles, Surgical Pearls: Techniques in Bariatric Surgery
Subscribe
If you enjoyed this article, subscribe to receive more just like it.

